POF shrink film is still the go-to for a lot of packaging jobs because it gives you decent see-through clarity, holds things together well, and shrinks down nicely once you hit it with the right amount of heat. When it's done right the package looks clean on the shelf and nothing shifts around in the truck or on the way to the customer. The difference between okay results and really consistent ones usually comes down to paying attention to the small stuff during setup, sealing, heating, and final checks.
Most people who run this kind of equipment see the same couple of headaches repeatedly—wrinkles in corners, weak seals popping open, or film that won't tighten all the way. Nine times out of ten those get fixed with minor tweaks rather than big equipment changes. Below is the step-by-step way things usually go in shops that do this day in and day out.
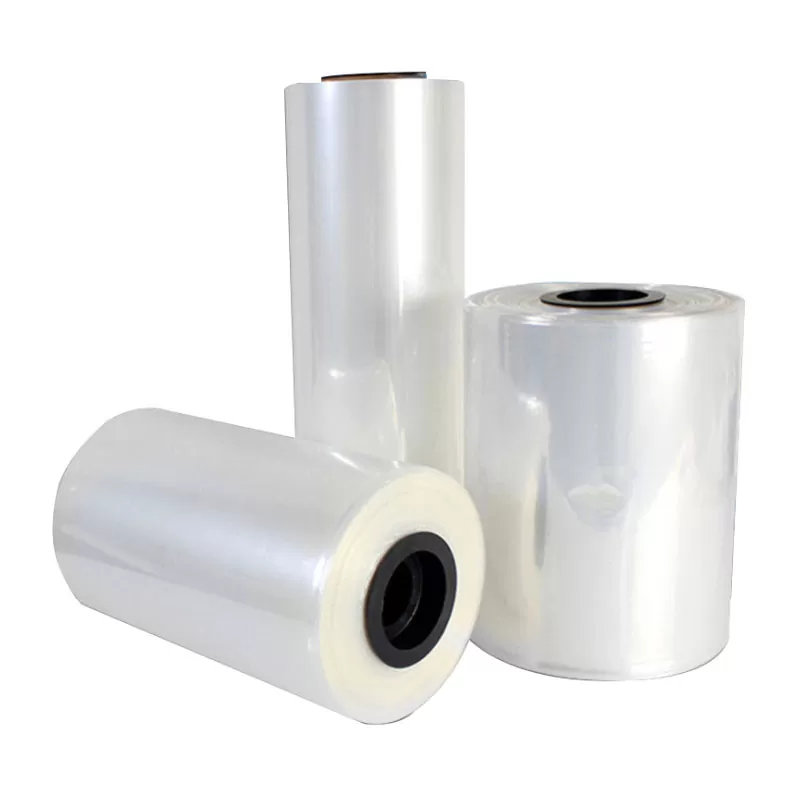
Polyolefin film is built in layers so it remembers to shrink roughly the same percentage lengthwise and crosswise when heat kicks in. That even pull stops the package from looking pulled funny one way or leaving air pockets on odd-shaped stuff. After it shrinks you still get pretty good transparency—barcodes scan, labels stay readable, no heavy fog.
Thinner rolls work fine for light retail multipacks; thicker ones handle heavier cases or anything with sharp edges that might poke through otherwise. A lot of lines keep two or three thicknesses ready because what comes in changes week to week. One thing people forget: leave rolls sitting in a hot trailer or damp corner too long and the film starts acting squirrelly—shrinks uneven or seals take longer to set. Keep it in a normal shop environment if you can.
Before anything else, eyeball the product and decide how much film you actually need. Run a tape around the fattest part, then add enough extra so you've got material for a decent seal on all four sides. Skimp on overlap and you fight to close it; leave way too much and you end up with ugly folds that never lay flat.
Clear a decent workspace—nothing worse than trying to maneuver a big box with tools and rolls everywhere. Set the film roll on a stand or cradle so it feeds straight without kinking. Give the sealing bars a once-over; old bits of melted film stuck on there will make patchy seals every time. Wipe them down with a rag (isopropyl if it's stubborn) and you're usually good. Have your trimmers, gloves, whatever else you use close by so you're not walking back and forth every package.
If you're using center-fold film, open it up flat with the fold running along one side. Slide the item in so it sits more or less centered—don't force it. Run your hand over the top sheet to ease out big air bubbles without yanking the film tight yet. Pull the open edges together across the top. On taller items watch that nothing pushes the film so hard it stretches thin in one spot.
Mixed-height stuff—like an assortment of bottles—needs a little more fiddling so the film settles naturally instead of bridging gaps. Once everything looks even, slide the overlap under your sealer bar. Press down firm and steady. You want enough dwell time to melt the layers together solidly, but go too long and the seal gets crispy and cracks later.
Set the package on the sealer table with the overlapped edge lined up under the bar. Bring the arm down so it clamps the two layers. On impulse machines you get that quick zap—melts and fuses almost instantly. For longer runs constant-heat bars stay hot and let you seal one after another without waiting.
First seal done, trim the excess off so it looks neat. Then hit the side seals, finish with the end one. Check each seal line with your eyes—any thin spot, gap, or wavy edge means it might split when it shrinks or gets bumped later. Thicker film sometimes likes a quick second pass over the same seal to make it bulletproof.
Between packages, glance at the bar. Melted residue builds up fast and messes with the next seal. Quick wipe every twenty or thirty items keeps you out of trouble.
Don't stack sealed packages and walk away for ten minutes—the film cools and starts acting stiff before you even get to the heat stage. Move them over right away, by hand or short belt, and try to keep them sitting flat so the fresh seals don't pull apart.
Air trapped inside is the silent killer here. If it can't get out it balloons the package when heat hits. Some films come micro-perforated which helps a ton on big boxes. On regular film a tiny vent hole or two (done carefully) can save you headaches.
Heat makes the film "remember"its shrunken shape and pull in tight. Tunnel systems blow hot air from the sides, top, and sometimes bottom so everything shrinks at once. Set the belt speed so packages aren't rushed through or baked forever—middle ground usually works best.
Handheld heat guns are still common for smaller shops or weird shapes. Keep the gun moving—circles, back-and-forth, whatever pattern covers without stopping. Start low on the package and work up; that lets air push out naturally as the bottom tightens first.
Pay attention to how the film reacts. It goes soft-looking first, then starts hugging the product. If it's doing that steadily you're in the ballpark.
With a heat gun you control exactly where the heat goes—great for one-offs or custom trays. Hold it back a few inches and never park it in one place. Corners always want to pucker up if they don't get enough heat, so give them a little extra time without overdoing flat areas.
Turn the package often so every side sees the same amount. As soon as you see tightening begin, ease off a bit—overcooking one spot makes it thin while another side stays baggy. When it's done the whole thing should feel solid with no floppy bits hanging.
Tunnels usually split the job into zones. Early section softens everything, middle blasts the main shrink, exit cools it fast so the shape locks in. Keep space between packages on the belt—too close and they touch and stick or mark each other.
Adjust the air direction if certain areas (like deep recesses) aren't pulling down. Watch what comes out the other end. If every package looks about the same you've got the settings dialed.
Timing tells you a lot. Soft stage → steady pull-down → locked tight. If one corner hangs back, a quick airflow tweak usually fixes it. Write down what works for each regular product; next time you're not guessing.
Every couple weeks run something through and feel around the tunnel vents—blockages or uneven flow show up fast this way.
| What You See | What’s Probably Happening | What Usually Fixes It |
|---|---|---|
| Wrinkles / loose spots | Heat not even or air stuck inside | Spread heat better; make sure air can escape |
| Seals splitting or weak | Not enough pressure / too short dwell | Crank pressure up a notch |
| Thin patches or pinholes | Heat gun stayed too long in one place | Keep moving—never stop |
| Doesn’t shrink all the way | Not enough total heat exposure | Slow conveyor or raise temp slightly |
| Dog ears in corners | Film too big or corners starved for heat | Tighter cut + extra heat on corners |
| Burnt-looking / brittle | Temp way too high | Drop setting and test again |
| Cloudy or scuffed surface | Dirty bar or residue transfer | Clean everything—bars especially |
Write down a basic checklist for each main product—film type, seal settings, tunnel speed/temp notes. Everyone follows it and you cut down on random variation. Grab a few packages off the line every shift and squeeze them—seals should feel strong, no give.
Room temp and humidity sneak in and affect things a little. If the morning batch acts different from afternoon, that's often why. Small adjustment and you're back on track.
Wipe bars and blow out tunnel vents regularly—buildup kills heat transfer. Grease chains or bearings when the manual says to. Swap out tired sealing wires or frayed belts before they strand you mid-run.
Have a couple spares sitting on the shelf. Five-minute fix beats a half-day wait for parts.
Gloves that handle heat and decent eye protection around hot bars/guns. Keep walkways clear—no tripping over rolls while carrying hot packages. Ventilation pulls fumes away so nobody's breathing weird stuff all day.
Everyone should know where the big red stop button is and how to kill power fast if something jams.
Good settings mean less electricity wasted reheating over and over. Save the trimmed-off strips for recycling if your area has a program. Cut film closer to actual size and you throw less away without skimping on protection.
Track how many rolls go through a week—small patterns show up and you can trim waste here and there.
If you stay methodical from layout to final check, POF packages come out tough, good-looking, and ready for the real world. The steps feed into each other—if one's off the next feels harder. Nail the routine and most days run smooth with very little rework.
When you need film that behaves predictably through standard sealing and shrinking setups, JTPackage keeps production lines focused on steady, no-surprises material. They watch the little things—consistency roll to roll—so it runs the way you expect without constant dialing.
JTPackage supplies POF that suits a wide mix of jobs while sticking to dependable performance on everyday equipment. Most lines pick it up and go with minimal fuss, which keeps output steady and headaches low.


JT05 Antifog Crosslinked Shrink Film is an ideal o...


Copyright © Zhejiang Jiuteng Packaging Co., Ltd.
 简体中文
简体中文
 Home
Home