POF shrink film remains one of the most popular choices for wrapping all sorts of products because it gives a clean, tight finish without much hassle once you get the hang of it. The film starts out fairly loose around whatever you're packaging—boxes of soap, multipacks of bottles, books, electronics trays, gift sets—and then tightens up nicely when heat hits it from the right distance and angle. That even pull in both directions is what makes POF stand out compared to films that shrink mostly one way and leave weird puckers or loose corners. People use it in small craft setups, retail packing stations, food co-packing lines, and even home-based side businesses because the results look professional without needing million-dollar equipment.
Getting consistent wraps comes down to a handful of repeatable steps and a bit of feel for how the film behaves. Rush any part—sealing, venting, heating—and you'll see wrinkles, dog ears, cloudy patches, or seals that pop open during shipping. Spend a little time dialing things in, and most packages come out smooth, secure, and shelf-ready.
Not every roll of POF behaves the same way, even if they're labeled for similar uses. Thickness plays a big role: lighter gauges work well for small, lightweight items like greeting cards or single candy boxes because they conform quickly without too much tension. Heavier gauges handle bigger bundles—cases of canned drinks, stacked jars, or multi-item gift baskets—without tearing at the corners or leaving weak spots after shrinking.
Centerfold rolls (folded in half lengthwise) are the easiest for most manual wrapping because you simply slide the product in like sliding a letter into an envelope. Single-wound rolls require more folding and sealing but give you flexibility when wrapping odd shapes or oversized trays. Width matters too—pick one that leaves enough overlap on the open sides (usually 2–4 inches depending on the bundle) so seals stay strong and you don't run out of material mid-wrap.
Storage affects performance more than most people realize. Keep rolls standing upright in a cool, dry spot away from direct sun or heaters. Stacking heavy things on top can crease edges and cause feeding problems later. If the film feels tacky or has picked up dust, it's probably been sitting in bad conditions and will be harder to seal cleanly.
A clean, organized bench or table makes a huge difference. Dust, crumbs, or stray bits of tape on the surface get trapped under the film and show up as ugly spots after shrinking. Wipe the work area down before starting each batch. Good lighting helps you spot fingerprints or wrinkles early.
Position the sealer so you can reach it easily without stretching awkwardly—repetitive strain adds up fast over a long shift. If you're using a heat gun, set up a stand or hook so you can set it down safely between packages. For tunnel users, make sure the infeed and outfeed tables are level and clear of obstructions. Keep scissors, a perforating wheel or needle tool, extra sealing tape, and a small trash bin right there so you're not walking away mid-process.
Ventilation is non-negotiable. Even though POF is fairly clean when heated, there's still a faint plastic smell that builds up in small rooms. Open a window or run a fan to move air. Heat-resistant gloves save your fingers when handling freshly sealed or shrunken packages—film can stay hot enough to burn for longer than you expect.
Lay the opened centerfold film flat on the table with the fold running along one side of your product. Slide or place the item inside so it sits centered with roughly equal film on all sides. Smooth the top layer down gently to remove big air pockets without stretching the film yet.
Bring the two open edges together over the top. If the bundle has height variation (tall bottles next to short boxes), make sure the taller parts aren't pushing the film too tight in spots. Run the overlapped edges through the sealer, applying steady pressure for a full second or two depending on your machine. The seal should look uniform and slightly wider than the sealing wire—no thin, translucent lines that scream weak spot.
Trim excess film close to the seal but leave a small margin—about 1/8 inch—so the edge doesn't peel back during shrinking. For multi-item packs, press the contents together lightly while sealing to keep everything snug. If the package feels like a loose balloon at this stage, give it a gentle tug on opposite corners to take up slack before moving to heat.
Air trapped inside is the number-one reason packages balloon, wrinkle, or develop unsightly bubbles. Larger or taller bundles trap more air than flat items, so plan for vents.
A perforating roller is the fastest way—roll it lightly over the bottom or less-visible sides to create a line of tiny holes. Handheld perforators or even a thick needle work for small runs; just poke several evenly spaced holes away from seals and product faces. Three to six holes usually do the trick for a standard retail multipack. Too many holes can weaken the film; too few leave air pockets.
For food packaging, keep vents minimal and on the underside or sides so they don't affect appearance or allow contamination. After venting, give the package a light squeeze to push excess air out before sealing the final edge.
Heat application separates good wraps from great ones. With a heat gun, hold it 6–10 inches away and move in overlapping passes like painting a wall—never hold still in one spot. Start on the largest flat surfaces (top and bottom), then work around the sides, saving corners and edges for last because they need more directed heat to pull tight.
Keep the gun moving constantly. If you see the film starting to wrinkle, slow down slightly and let the heat soften it before continuing. Rotate the package or walk around it so every side gets equal exposure. Once the film tightens and conforms without loose flaps, move it to a cooling rack or flat surface with good airflow. Don't stack hot packages; they'll deform under weight.
In a shrink tunnel, speed and temperature settings matter more than you might think. Too fast and the film doesn't have time to shrink fully; too slow and edges can burn or over-shrink. Most tunnels have adjustable conveyor speeds and zone temperatures—start conservative and tweak based on how the first few packages look coming out. A quick cool-down zone at the exit helps set the shape before the package hits the packing table.
Wrinkles usually mean uneven heat or too much slack before sealing—go back with gentle, sweeping passes until the surface smooths. Dog ears (loose triangular flaps at corners) happen when heat misses those spots; focus the gun there longer next time or slow the tunnel slightly.
Burn-through or small holes come from lingering too long in one area—keep motion steady and test heat distance on scrap film first. Cloudy or hazy patches after cooling often trace back to dirty film, oily hands, or dust on the product—clean everything more thoroughly. Weak seals that split during handling point to insufficient dwell time, dirty sealing bars, or low temperature—clean the bar and increase pressure or heat a notch.
Keep notes on what worked for each product type. After a few weeks you'll have quick reference points: "12-bottle tray needs 4 extra vents and slower tunnel speed," or "flat book packs seal best at medium pressure with 3-second dwell."
Flat, rigid items like boxed games or stacked magazines wrap easily with minimal venting and quick heat passes. Curved or tall products—wine bottles, shampoo sets—need more vents and careful rotation during heating so the film follows the shape without bridging.
Multi-packs of cans or jars require tight alignment before sealing and heavier-gauge film to prevent shifting during transit. Irregular shapes (toys, gift baskets) benefit from pre-shaping the film loosely by hand to reduce tension points. Delicate electronics or glass need inner cushioning and lower heat settings to avoid pressure marks.
Food items often run through tunnels on the cooler side to preserve freshness and appearance. Trial packs are your friend—wrap one, shrink it, inspect every angle, adjust, repeat until it looks right.
Clean sealing bars after every session with a soft cloth and isopropyl alcohol to remove residue that weakens future seals. Check wires or elements for wear and replace them before they fail mid-run. For tunnels, blow dust off heating elements and check belt tension regularly.
Store film rolls upright, away from heat sources and sunlight. Cover open rolls with plastic bags or the original wrap to keep dust out. Rotate stock so you use older film first. A little maintenance goes a long way toward fewer jams, cleaner seals, and less wasted material.
POF gives you high clarity and balanced shrinkage that many other films can't match for retail or food applications. PVC shrinks mostly one way and can yellow over time. Basic polyethylene handles heavy loads but looks cloudier and feels rougher. Cross-linked versions of POF push clarity and strength further for high-speed lines, but standard POF covers most everyday needs without the extra cost.
POF shrink film delivers clean, professional packaging when you follow a consistent routine: prep the product, wrap and seal carefully, vent air, apply even heat, and let it cool undisturbed. Small tweaks based on product shape and batch size turn average wraps into ones that look like they came off an automated line.
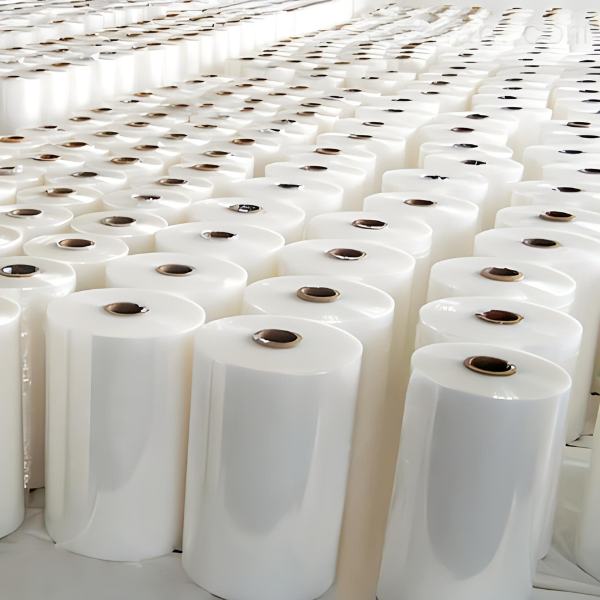
For consistent POF shrink film that feeds smoothly and shrinks evenly across different setups, factories like Jtpackage produce rolls with clean winding, uniform gauge, and reliable centerfold construction. Jtpackage focuses on materials suited to both hand-wrapping stations and tunnel lines, keeping edges straight and surfaces free of dust so you spend less time fighting jams or cleaning seals.
Jtpackage offers a selection of gauges and widths that cover retail multipacks, food trays, gift sets, and industrial bundles while maintaining clarity and strength after shrinking. Getting in touch with Jtpackage gives you access to film that supports steady output and professional-looking packages without constant adjustments.


JT05 Antifog Crosslinked Shrink Film is an ideal o...


Copyright © Zhejiang Jiuteng Packaging Co., Ltd.
 简体中文
简体中文
 Home
Home